USB Application Guide
Contents
Introduction
These examples demonstrate the ease of use of the Flowcode USB components.
In particular they make use of the USB peripheral of the PIC18F4455, used with an EB006 E-blocks multiprogrammer, or ECIO40.
However, the examples are easily changed in Flowcode to support other microprocessors and platforms.
The Matrix TSL EB442SI6 Easy USB bundle or EB468SI6 Build your own PC interface bundle have all the items required for these sample applications and are an ideal introduction to USB technology.
Setting up the project hardware
Connect the E-Blocks as indicated in the table below.
The downstream E-Blocks boards need to be powered via wire connections to the +V on their respective EB006 upstream processor board.
| EB006 | PIC18F4455 multiprogrammer | |
| Port A | EB004 | E-blocks LED board |
| Port B | EB005 | E-blocks LCD board |
| Port C | EB055 | E-blocks USB interface |
| Port D | EB007 | E-blocks switch board |
| EB061 | ECIO40 and base board | |
| Port A | EB004 | E-blocks LED board |
| Port B | EB005 | E-blocks LCD board |
| Port C | ||
| Port D | EB007 | E-blocks switch board |
The examples here are configured for use with the PIC18F4455 and EB006 E-blocks multiprogrammer.
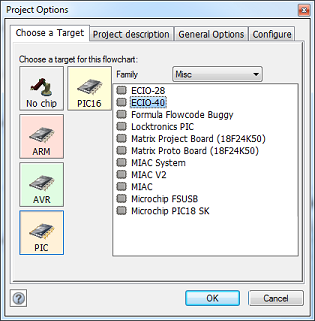
For use with ECIO40, simply change the target device via the Flowcode menu: Build->Project Options->Choose a Target
Example 1: Simple data-logging HID device
Example 1 is a simple data-logging program that creates a USB device that connects to the computer as a HID keyboard, so no driver file is required. It is recommended to ensure that the num lock key is not active when programming this example otherwise you will get a stream of text data being entered to the computer similar to if you held a key down on your keyboard.
On the host PC, run a spreadsheet program and click into a cell.
Then press the num lock key on your keyboard and the logging output will start.
Pressing the num lock key again will tell the USB device to stop logging data.
The program samples the analogue channel connected to pin RA0 of the microcontroller and returns the value as a byte value 0-255.
Example 2: USB virtual serial device
File:Apps USB Ex2 Terminal Driver.inf
Example 2 is a basic terminal emulator that allows you to connect to the device using serial port software such as HyperTerminal or RealTerm. An example USB driver for the device is included along with the example file above.
The example allows you to enter data via the serial port software on your computer and this forwards the text to the LCD display.
Example 3: USB Slave device as part of an interactive PC application
File:Apps USB Ex3 VB2008 Source Code.zip
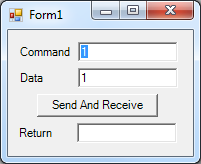
Example 3 demonstrates how to use a computer programming language such as Microsoft Visual Basic to control a USB embedded device.
Several Flowcode macros are made available to the computer by means of creating a command look up table.
Every time the computer sends a packet to the slave USB device the slave service routine is triggered allowing the microcontroller to process the command and then return any data if applicable.
The Visual Basic example code can be opened and compiled using the freely downloadable version of Visual Studio. An example USB driver for the device is also included above with the example files.

