Difference between revisions of "Exercise - System Panel - Controlling Shapes"
From Flowcode Help
Jump to navigationJump to searchJohnVerrill (talk | contribs) |
JohnVerrill (talk | contribs) |
||
| Line 4: | Line 4: | ||
* Open the flowchart "System_Panel_Add_LED" which you created in [[Exercise - System Panel - Adding Objects]]. | * Open the flowchart "System_Panel_Add_LED" which you created in [[Exercise - System Panel - Adding Objects]]. | ||
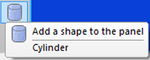
| − | * Click and drag | + | * Click and drag a cylinder onto the System Panel. [[File:gen_exerciseSystemPanelcontrolviewpoint_addcylinder_01.png|150px|right]] |
* Click on it to select it. You will see five properties listed on the Panel Properties, | * Click on it to select it. You will see five properties listed on the Panel Properties, | ||
: 'Shape', 'Color', 'Outline', 'Thickness' and 'Image'. | : 'Shape', 'Color', 'Outline', 'Thickness' and 'Image'. | ||
* The default 'color' property is red (0x0000C0). Click on tis value, and change the color to black (0x000000). | * The default 'color' property is red (0x0000C0). Click on tis value, and change the color to black (0x000000). | ||
| + | |||
| + | * Click on the 'Scale with mouse' icon | ||
Revision as of 13:33, 29 May 2013
The following assumes that you have added a single LED to the System Panel, as described in Exercise - System Panel - Adding Objects.
The aim of this exercise is to mount the LED on the car's instrument panel, and to control the viewpoint of the resulting component.
- Open the flowchart "System_Panel_Add_LED" which you created in Exercise - System Panel - Adding Objects.
- Click and drag a cylinder onto the System Panel.
- Click on it to select it. You will see five properties listed on the Panel Properties,

- 'Shape', 'Color', 'Outline', 'Thickness' and 'Image'.
- The default 'color' property is red (0x0000C0). Click on tis value, and change the color to black (0x000000).
- Click on the 'Scale with mouse' icon