Difference between revisions of "Chip View"
| (3 intermediate revisions by one other user not shown) | |||
| Line 1: | Line 1: | ||
| − | <sidebar>Sidebar: | + | <sidebar>Sidebar: Flowcode Help Overview:ToolsViews</sidebar> |
| − | [[File: | + | [[File:Gen_Chip_View_16F877A.png|right]] |
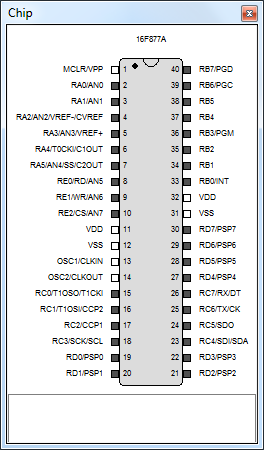
| − | The '''Chip View''' window displays the currently targeted microcontroller, it allows the user to see a map of the chip to clarify it's capabilities, it allows the user to plan and organize and program the flowchart appropriately. The 'Chip View' improves efficiency by displaying the | + | The '''Chip View''' window displays the currently targeted microcontroller, it allows the user to see a map of the chip to clarify it's capabilities, it allows the user to plan and organize and program the flowchart appropriately. The 'Chip View' improves efficiency by displaying the microcontroller's pins so that the user can clearly see and understand what each pin is connected to and where it is positioned on the chip. |
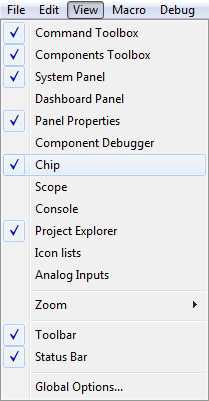
You can access the Chip View window by selecting 'Chip' via the 'View' menu (View > Chip). You can [[Specifying a Target Chip|specify a target chip]] and change the current chip using the 'Choose a Target' tab in the [[Project Options]] window which is accessed via the 'Build' menu (Build > Project Options...). | You can access the Chip View window by selecting 'Chip' via the 'View' menu (View > Chip). You can [[Specifying a Target Chip|specify a target chip]] and change the current chip using the 'Choose a Target' tab in the [[Project Options]] window which is accessed via the 'Build' menu (Build > Project Options...). | ||
| − | + | [[File:Gen_View_Menu_Chip.png|center|frameless]] | |
| − | [[File:Gen_View_Menu_Chip.png|center]] | ||
This window is not only useful for beginners it is also very useful for advanced users as it allows the user to keep in mind what microcontroller they are using, this proves especially useful when swapping between multiple different chips and for learning new chips quickly and easily. | This window is not only useful for beginners it is also very useful for advanced users as it allows the user to keep in mind what microcontroller they are using, this proves especially useful when swapping between multiple different chips and for learning new chips quickly and easily. | ||
| Line 13: | Line 12: | ||
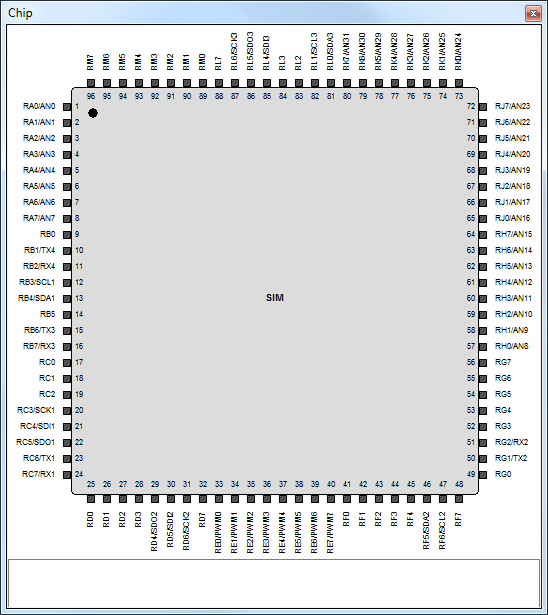
Flowcode now also provides a Simulation or 'SIM' chip which allows the user to use all pins and ports in simulation within Flowcode, if you select 'No chip' when specifying the target chip then Flowcode will default to the 'SIM' chip. This not only improves efficiency, it also enhances the quality of the program, although the program will not run on hardware you can create complex and versatile systems and applications to simulate. | Flowcode now also provides a Simulation or 'SIM' chip which allows the user to use all pins and ports in simulation within Flowcode, if you select 'No chip' when specifying the target chip then Flowcode will default to the 'SIM' chip. This not only improves efficiency, it also enhances the quality of the program, although the program will not run on hardware you can create complex and versatile systems and applications to simulate. | ||
| − | + | [[File:Gen_Chip_View_SIM.png|center]] | |
Latest revision as of 16:48, 7 March 2014
<sidebar>Sidebar: Flowcode Help Overview:ToolsViews</sidebar>
The Chip View window displays the currently targeted microcontroller, it allows the user to see a map of the chip to clarify it's capabilities, it allows the user to plan and organize and program the flowchart appropriately. The 'Chip View' improves efficiency by displaying the microcontroller's pins so that the user can clearly see and understand what each pin is connected to and where it is positioned on the chip.
You can access the Chip View window by selecting 'Chip' via the 'View' menu (View > Chip). You can specify a target chip and change the current chip using the 'Choose a Target' tab in the Project Options window which is accessed via the 'Build' menu (Build > Project Options...).
This window is not only useful for beginners it is also very useful for advanced users as it allows the user to keep in mind what microcontroller they are using, this proves especially useful when swapping between multiple different chips and for learning new chips quickly and easily.
Flowcode now also provides a Simulation or 'SIM' chip which allows the user to use all pins and ports in simulation within Flowcode, if you select 'No chip' when specifying the target chip then Flowcode will default to the 'SIM' chip. This not only improves efficiency, it also enhances the quality of the program, although the program will not run on hardware you can create complex and versatile systems and applications to simulate.


