Difference between revisions of "Custom Interrupts - PICmicro"
| (29 intermediate revisions by 3 users not shown) | |||
| Line 1: | Line 1: | ||
| + | Here are a few examples for such interrupts using PICmicro chips. To create interrupts that are not shown below you will have to refer to the device datasheet. Once the code has been placed into the custom interrupt properties dialog, the interrupt can be enabled and disabled like any of the standard Flowcode [[Interrupt Icon Properties|Interrupts]]. | ||
| − | |||
| − | |||
| − | |||
'''USART receive''' - This can be nicely integrated with the Flowcode RS232 component. | '''USART receive''' - This can be nicely integrated with the Flowcode RS232 component. | ||
| Line 10: | Line 8: | ||
'''Timer1''' rollover - An example of the use of another unsupported, but potentially useful, function. | '''Timer1''' rollover - An example of the use of another unsupported, but potentially useful, function. | ||
| − | <span style="color:#FF0000"> Target PIC Processor ( PIC16F877A ) | + | <span style="color:#FF0000"> '''Target PIC Processor ( PIC16F877A )''' </span> |
| − | (Note: For other PIC devices you may have to refer to the device datasheet to obtain the correct code) </span> | + | <span style="color:#FF0000"> '''(Note: For other PIC devices you may have to refer to the device datasheet to obtain the correct code)''' </span> |
| − | + | ==USART Receive== | |
| + | [[File:Gen_Custom_Interrupts_PICmicro_USART.png|right]] | ||
The Flowcode RS232 component can be used to set the Baud rate and configure the mode of operation, and the ReceiveRS232Char function can be used in the handler macro to read the data (clearing the interrupt). | The Flowcode RS232 component can be used to set the Baud rate and configure the mode of operation, and the ReceiveRS232Char function can be used in the handler macro to read the data (clearing the interrupt). | ||
| Line 23: | Line 22: | ||
'''Enable code:''' | '''Enable code:''' | ||
| − | + | <font style="color:#000080"> INTCONbits.PEIE = 1; // Enable peripheral interrupts | |
| − | + | INTCONbits.GIE = 1; // Enable global interrupts | |
| − | + | PIE1bits.RCIE = 1; // Enable USART receive interrupts </font> | |
| − | Disable code: | + | '''Disable code:''' |
| − | + | <span style="color:#000080"> PIE1bits.RCIE = 0; // Disable USART receive interrupts </span> | |
| − | Handler code: | + | '''Handler code:''' |
| − | if ( | + | <font style="color:#000080"> if (PIR1 & (1 << RCIF)) // Check to see if the interrupt flag is set |
{ | { | ||
| − | |||
| − | + | FCM_%n(); // Call Flowcode Macro | |
| − | + | PIR1bits.RCIF = 0; // Clear interrupt flag | |
| + | } </font> | ||
| − | |||
| − | + | ==Analogue Comparator== | |
| − | Enable code: | + | [[File:Gen_Custom_Interrupts_PICmicro_COMPARE.png|right]] |
| + | '''Enable code:''' | ||
| − | + | <font style="color:#000080"> INTCONbits.PEIE = 1; // Enable peripheral interrupts | |
| − | + | INTCONbits.GIE = 1; // Enable global interrupts | |
| − | + | PIE1bits.CCP1IE = 1; // Enable Capture Compare interrupts </font> | |
| − | Disable code: | + | '''Disable code:''' |
| − | + | <span style="color:#000080"> PIE1bits.CCP1IE = 0; // Disable Capture Compare Interrupts </span> | |
| − | Handler code: | + | '''Handler code:''' |
| − | if ( | + | <font style="color:#000080"> if (PIR1 & (1 << CCP1IF)) // Check to see if the interrupt flag is set |
{ | { | ||
| − | |||
| − | + | FCM_%n(); // Call Flowcode Macro | |
| + | |||
| + | PIR1bits.CCP1IF = 0; // Clear interrupt flag | ||
| − | } | + | } </font> |
| Line 81: | Line 81: | ||
| − | FCV_COMPSTATE = | + | <span style="color:#000080"> FCV_COMPSTATE = ccpr1l | ( ccpr1h << 8 ); </span> |
| + | {| width="auto" | ||
| + | |<pre>** compstate must be declared as an integer variable **</pre> | ||
| + | |} | ||
| − | + | ==Timer1 Rollover== | |
| − | ''' | + | [[File:Gen_Custom_Interrupts_PICmicro_TMR1.png|right]] |
| + | '''Enable code:''' | ||
| + | <font style="color:#000080"> T1CON = 0x79; // Start timer with Internal clock source, prescaler = 1:8 | ||
| − | + | INTCONbits.PEIE = 1; // Enable peripheral interrupts | |
| + | INTCONbits.GIE = 1; // Enable global interrupts | ||
| − | Enable | + | PIE1bits.TMR1IE = 1; // Enable Timer 1 interrupts </font> |
| − | |||
| − | + | '''Disable code:''' | |
| − | + | <span style="color:#000080"> PIE1bits.TMR1IE = 0; // Disable Timer 1 interrupts </span> | |
| − | |||
| + | '''Handler code:''' | ||
| − | + | <font style="color:#000080"> if (PIR1 & (1 << TMR1IF)) // Check to see if the interrupt flag is set | |
| − | |||
| − | |||
| − | |||
| − | |||
| − | |||
| − | |||
| − | if ( | ||
{ | { | ||
| − | FCM_%n(); | + | FCM_%n(); // Call Flowcode Macro |
| − | + | PIR1bits.TMR1IF= 0; // Clear interrupt flag | |
| − | } | + | } </font> |
| Line 125: | Line 123: | ||
| − | FCV_CAPTVAL = TMR1L | ( TMR1H << 8 ); | + | <span style="color:#000080">FCV_CAPTVAL = TMR1L | ( TMR1H << 8 ); </span> |
| − | |||
| − | |||
| − | |||
| − | + | {| width="auto" | |
| + | |<pre>** captval must be declared as an integer variable **</pre> | ||
| + | |} | ||
Latest revision as of 12:10, 3 July 2019
Here are a few examples for such interrupts using PICmicro chips. To create interrupts that are not shown below you will have to refer to the device datasheet. Once the code has been placed into the custom interrupt properties dialog, the interrupt can be enabled and disabled like any of the standard Flowcode Interrupts.
USART receive - This can be nicely integrated with the Flowcode RS232 component.
Comparator - Example of the use of a function not supported by Flowcode.
Timer1 rollover - An example of the use of another unsupported, but potentially useful, function.
Target PIC Processor ( PIC16F877A )
(Note: For other PIC devices you may have to refer to the device datasheet to obtain the correct code)
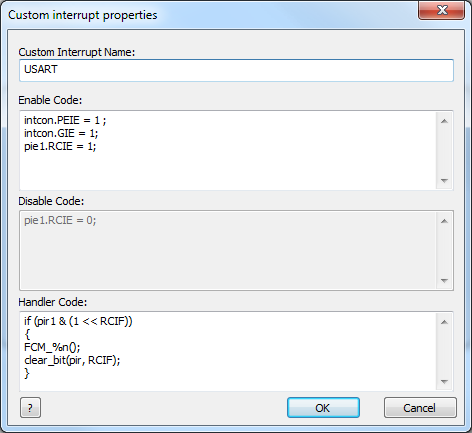
USART Receive
The Flowcode RS232 component can be used to set the Baud rate and configure the mode of operation, and the ReceiveRS232Char function can be used in the handler macro to read the data (clearing the interrupt).
Enable code:
INTCONbits.PEIE = 1; // Enable peripheral interrupts
INTCONbits.GIE = 1; // Enable global interrupts
PIE1bits.RCIE = 1; // Enable USART receive interrupts
Disable code:
PIE1bits.RCIE = 0; // Disable USART receive interrupts
Handler code:
if (PIR1 & (1 << RCIF)) // Check to see if the interrupt flag is set
{
FCM_%n(); // Call Flowcode Macro
PIR1bits.RCIF = 0; // Clear interrupt flag
}
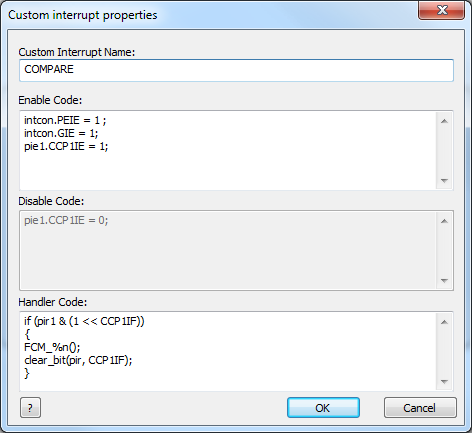
Analogue Comparator
Enable code:
INTCONbits.PEIE = 1; // Enable peripheral interrupts
INTCONbits.GIE = 1; // Enable global interrupts
PIE1bits.CCP1IE = 1; // Enable Capture Compare interrupts
Disable code:
PIE1bits.CCP1IE = 0; // Disable Capture Compare Interrupts
Handler code:
if (PIR1 & (1 << CCP1IF)) // Check to see if the interrupt flag is set
{
FCM_%n(); // Call Flowcode Macro
PIR1bits.CCP1IF = 0; // Clear interrupt flag
}
The state of the comparator input can be read into a Flowcode variable 'compstate' with the following C code line:
FCV_COMPSTATE = ccpr1l | ( ccpr1h << 8 );
** compstate must be declared as an integer variable ** |
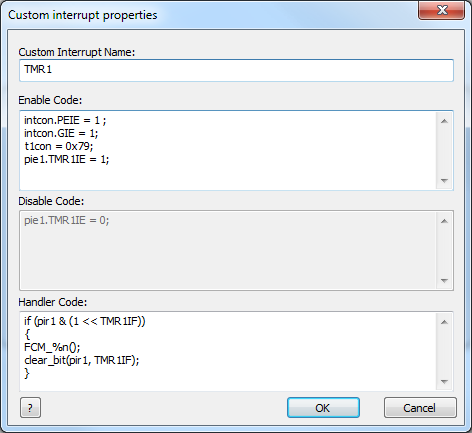
Timer1 Rollover
Enable code:
T1CON = 0x79; // Start timer with Internal clock source, prescaler = 1:8
INTCONbits.PEIE = 1; // Enable peripheral interrupts
INTCONbits.GIE = 1; // Enable global interrupts
PIE1bits.TMR1IE = 1; // Enable Timer 1 interrupts
Disable code:
PIE1bits.TMR1IE = 0; // Disable Timer 1 interrupts
Handler code:
if (PIR1 & (1 << TMR1IF)) // Check to see if the interrupt flag is set
{
FCM_%n(); // Call Flowcode Macro
PIR1bits.TMR1IF= 0; // Clear interrupt flag
}
The captured 16-bit count value can be read into a Flowcode variable 'captval' with the following C code line:
FCV_CAPTVAL = TMR1L | ( TMR1H << 8 );
** captval must be declared as an integer variable ** |


